Live streaming lets an audience watch an event while it happens. A camera or computer captures video and audio, an encoder prepares the signal for transmission, and a delivery service brings it to viewers. Understanding each stage helps creators choose a setup that fits their event and troubleshoot problems before going live.
A Review of the Live Streaming Workflow
Capture. The source might be a camera at an event, a screen recording, or a combination of video and microphones. Production software can arrange these sources into scenes, mix audio, and send the finished program to a streaming destination. OBS Studio’s quick start guide explains the basic setup.
Ingest and encoding. The streaming destination receives the broadcaster’s signal. To reach people on different connections, a service can encode the video at several quality levels. A viewer with a faster connection may receive a sharper version, while another receives a smaller version that is less likely to buffer. AWS documentation describes a live video delivery workflow.
Packaging and distribution. HTTP Live Streaming, or HLS, divides a stream into media segments and uses playlists to tell a player what to request. A content delivery network helps serve the stream to a larger audience across different locations. Apple’s HLS documentation explains the delivery method.
Playback. A player on a website or app displays the broadcast. Startup time, buffering, picture quality, clear audio, captions, and mobile compatibility all shape the viewer’s experience.
How to Create a Live Stream for Public Viewing
- Define the broadcast Decide what you will show, who may watch, and whether the event needs captions, chat, or a recording afterward. Confirm that you have permission to broadcast the video, music, and other material you plan to use.
- Prepare the equipment Start with a camera or screen source, a clear microphone, a computer or hardware encoder, and a stable internet connection. Test audio in the actual recording space.
- Set up the encoder In OBS Studio, add the camera, microphone, screen, and graphics as sources. Check audio levels, choose an output resolution and frame rate the equipment can sustain, and record a short test clip.
- Choose a streaming destination A hosted platform provides a straightforward route to publication. A custom setup offers more control but requires an ingest endpoint, encoding, packaging, distribution, monitoring, and maintenance. Connect the encoder using the destination’s server details and keep the stream key private.
- Prepare the viewing page Add a player to your website and write a clear title and description. Test the page on desktop and mobile devices. For a scheduled event, publish the viewing page early so visitors know where to return.
- Run a private rehearsal Watch the stream as a viewer would. Check audio sync, startup time, and playback after a short network interruption. Prepare a backup connection or holding screen for important events.
- Go live and monitor Watch both the outgoing signal and the public player throughout the event. Afterward, review playback problems and viewer feedback before the next broadcast.
Final Review
The right setup depends on the event. A small interview may need only a camera, OBS Studio, and a hosted platform. A larger public event may need multiple cameras, several encoded quality levels, captions, a content delivery network, and a backup workflow. Start with a tested broadcast and expand the system when audience size and production needs justify it.
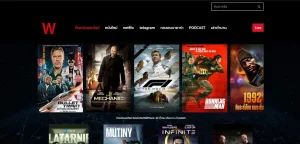
For an example of an online movie viewing website, visit isee.movie.