
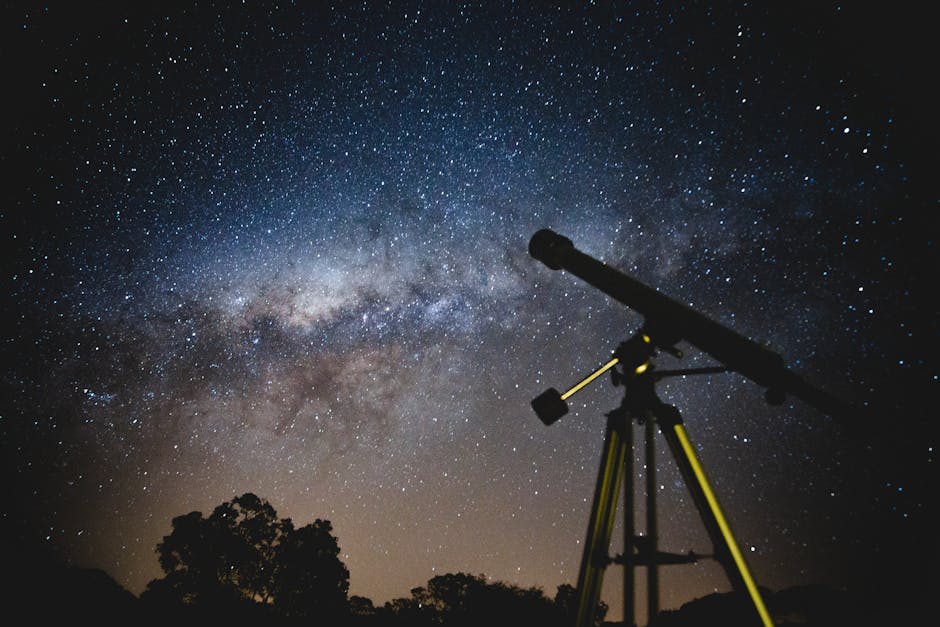
 Photo by Lucas Pezeta
Originally Posted On: https://www.astrojunkies.com/reflecting-vs-refracting-telescopes/
For centuries, there has always been the ongoing debate of reflecting vs refracting telescopes. Telescopes are classified according to the method of how they focus the image into the eyepiece: refracting telescopes use lenses to focus light, while reflecting telescopes use mirrors.
So, which is better for beginners? Are there any differences in performance? Which are more expensive?
In this guide, we will address those questions and help you decide on the best telescope to purchase according to your needs and preferences.
Before we begin, we will first discuss the key terms and important concepts in telescopes that we’ll use throughout this guide.
Reflecting vs Refracting Telescopes: Key TermsBefore we discuss the refracting and reflecting telescopes individually, let us first discuss key terms and/or specifications that are common to all types of telescopes:
ApertureAperture is the diameter of the primary lens (in refracting telescopes) or the primary mirror (in reflecting telescopes). The larger the aperture, the more light the telescope gathers. In turn, the more light gathered, the more details that can be seen and the dimmer the objects that can be seen.
This will translate to clearer images, and so we can apply an eyepiece with bigger magnifications. Apertures are typically measured in mm or inches. Decent amateur telescopes have an aperture of 3.15” to 16” (80 mm to 400 mm), and some really top-end professional telescopes can have an aperture of 400 inches (10 meters).
Focal LengthThe focal length is the distance from the primary lens (in refracting telescopes) or the primary mirror (in reflecting telescopes) to the point where the image is formed (which will differ depending on the types of the telescope).
The focal length is effectively the length of the telescope itself. A short focal length will produce a wider field of view (more on this below), but the images will be smaller. Long focal length, on the other hand, will give a narrower field of view but the objects will appear larger.
So, telescopes with shorter focal lengths are best for observing larger objects (galaxies, nebulae, star fields, etc.). On the other hand, long focal lengths are most suitable for studying deep space objects with fine detail (planets, the Moon, etc.).
Field of ViewIn a telescope, the field of view or FOV is how much of the sky we can see when looking through the eyepiece of the telescope. We measure FOV in degrees: the higher the degree of FOV, the wider the angle and the smaller things will look through the telescope. On the other hand, the lower the FOV degree, the narrower the view and the closer things will look.
So, FOV is closely related to magnifications: If we change eyepieces for higher magnification, we’ll get a smaller FOV.
We can actually divide FOV into two: apparent FOV and true FOV:
- Apparent Field of View: FOV when the eyepiece is not attached to the telescope
- True Field of View: FOV when the eyepiece is attached to the telescope
The apparent FOV (or AFOV) is generally obtainable from the manufacturer from the eyepiece. Most standard-quality eyepieces have an AFOV of 50 degrees. With this information, we can then calculate the true FOV of the eyepiece.
First, calculate the magnification of the eyepiece:
Magnification is how bigger the image is compared with the original object.
Magnification = focal length of the scope / focal length of the eyepiece lens
It’s important to note that there are limits to the clarity/sharpness that can be produced by a telescope. The earth’s atmosphere naturally blurs the deep space objects when we view them from the Earth. So, when these objects are magnified, it will be bigger but not clearer.
Then, we can calculate true FOV by dividing AFOV with magnification
TFOV=AFOV/Magnification
If for example, the AFOV is 50 degrees, and the focal length of the scope is 1,000 mm (should be listed on the scope/instructions manual), then:
Magnification=1,000/10= 100x
True FOV=50/100=0.5 degrees
As we can see, true FOV is always much smaller than apparent FOV.
Focal RatioFocal ratio is the ‘speed’ of the telescope, and is calculated by dividing the focal length by the aperture, and is symbolized with f/ or F. The smaller the F-number, the lower the magnification, while the bigger the focal ratio, the brighter the image produced.
So, ‘fast’ focal rations like F4 or F5 are better for deep space photography and observations for wide fields, and ‘slow’ focal ratios from F11 to F15 are better suited to observe objects with more details like planets and the Moon. Medium ratios (F6 to F10) can be considered well-rounded.
How Do Refracting Telescopes Work?The refracting telescope was invented by Hans Lippershey (a German-Dutch) back in 1608 and was famously used by Galileo Galilei. Hans Lippershey is also the inventor of spectacle, and the refracting telescopes (refractors) were initially made for military use.
Galileo was the first to use the refractor technology in astronomy, and in 1611, Kepler improved the design to use two convex refractor lenses (which made the image upside-down, more on this later).
Our refracting telescopes today are still based mainly on the Keplerian design, with just a few improvements and the usage of modern materials. The basic mechanism of the Keplerian reflecting telescope is illustrated in the image below:
 Image source: http://www.astronomy.ohio-state.edu/~thompson/161/telescopes.html
The basic way a refracting telescope works is that it refracts (or, bends) light between two lenses. One of the two lenses is in the eyepiece, and the other is at the end of the tube.
The maximum speed of light through a vacuum, as we know, is 3× 10⁸ m/s, however, the speed will vary depending on the materials it went through. So, when the light travels from one medium to another, it will change speed. The thing is, when there’s a change in speed, it may also cause a change of direction (essentially, bends the light).
 Image source: https://static.sciencelearn.org.nz/images/images/000/000/049/embed/Refraction-of-light-in-water20150805-30610-expmep.jpg?1522292079
The amount of bending or refracting depends on two things:
● Speed change: The bigger the slowdown, the more it will bend
● Angle of entrance: If the light enters the medium at a greater angle, it will bend more. If the light enters the new medium at 90° to the surface, it will only slow down but it won’t change direction at all.
So, how can we determine how fast the light can travel through the respective medium? The answer is refractive index or index of refraction.
In general, the index of refraction of a respective medium is the ratio of the light’s speed in a vacuum to the light’s speed in the medium. The higher the index of refraction, the more the light will be slowed down by the medium.
Below are the Index of refraction for common mediums:
| Substance | Index of Refraction |
| Vacuum | 1 |
| Air | 1.0003 |
| Water | 1.3 |
| Ethyl alcohol | 1.4 |
| Ice | 1.3 |
| Glass | 1.5 |
| Diamond | 2.4 |
Refracting telescopes utilize this refracting principle by using two convex lenses. A convex lens refracts the lights inwards. The bending of light is what makes the image bigger (or smaller). The lens placed on the end of the telescope tube is called the objective lens, and the other one is called the eyepiece for obvious reason.
The idea is that these lenses gather more light that our natural human eyes and the focused light generated by the lenses will make the distant objects brighter, bigger (magnified), and clearer.
Chromatic Aberration
Chromatic aberration is a common problem in any lens, and so refracting telescopes also suffer from chromatic aberration. Also known as dispersion or color fringing, chromatic aberration occurs when the light colors are incorrectly bent (refracted) by the lens, and so the colors don’t combine properly as they should.
The result of chromatic aberration is that the images will feature blurred colors surrounding them, in front of and behind the focus position. No matter how good/expensive your refractive telescope is, we can’t completely eliminate chromatic aberration as long as they still use lenses.
Chromatic aberration is the most important issue when discussing the case of reflecting vs refracting telescopes.
How Do Reflecting Telescopes Work?The Reflecting telescope is developed in around 1680 by no other than Isaac Newton. Actually, reflecting telescopes were invented to tackle the chromatic aberration issue (as we’ve discussed above). Chromatic aberration is a very prominent issue back in Newton’s time, and so, Newton’s solution is to use mirrors instead of lenses to collect light and then reflect it to a focus.
Inside the telescope tube are usually two curved mirrors. These mirrors will be used to reflect the image and refocus it into the eyepiece.
 Image source: http://www.astronomy.ohio-state.edu/~thompson/161/telescopes.html
A curved primary mirror is used to gather lights, and it is angled in a certain way to reflect these lights against the secondary mirror. The eyepiece, on the other hand, is directed towards the secondary mirror, and it is the secondary mirror that will enhance and magnify the image.
Most of us are familiar with how mirrors work. When light hits a flat mirror, the mirror will bounce the light.
The Newton’s design for reflecting telescopes allow the curved mirrors to bend light and make parallel rays converge to a certain focus (in this case, the focus is the secondary mirror), just like the image below.

However, there are other designs besides the Newtonian reflecting telescopes that feature different approaches to where to focus the light. As we’ve discussed, in a Newtonian design, a flat secondary mirror is used to focus the light rays out to an eyepiece, and here are some other design alternatives.
 Image source: https://upload.wikimedia.org/wikipedia/en/thumb/2/2c/Cassegrain.en.png/450px-Cassegrain.en.png
Cassegrain reflecting telescope features a convex secondary mirror and a hole in the middle of the primary mirror (see the image above).
Prime focus telescopes only use one mirror and the image is observed at the focal point of the primary mirror. This is done by having an electronic detector or a film plate placed on the focal point.
The above image illustrates what we call the Nasmyth/coudé light path. The Nasmyth reflecting telescopes are similar to the Cassegrain, but it doesn’t feature a hole in the primary mirror. Instead, it uses the third mirror to reflect the light to the side.
Nasmyth is a very common design in larger telescopes. The Coudé design utilizes a similar light path with the Nasmyth but typically includes more additional optics.
Why Do Images Appear Upside-Down?If this is your first time in using a telescope, probably the biggest surprise you’d get is when you find out that what you see through the telescope is backward, or upside down. It is actually a normal thing depending on the type of your telescope.
It’s important to understand that all lenses and mirrors will produce upside-down images, so this is not only the case for telescopes (both reflectors and refractors), but also cameras and other catadioptrics.
We can correct the alignment by adding additional optics (and some telescopes do this, especially those with more than 2 lenses or mirrors), but for astronomical viewing, it’s not very important whether an object is displayed correctly since there’s no up or down in deep space.
In general:
- Newtonian reflecting telescopes will always produce upside-down images, and so they are not recommended for terrestrial (land) use. It’s very difficult to correct image alignment in a Newtonian reflector.
- Refractor and Cassegrain telescopes will produce upside-down images. To correct this, we can use star diagonals (affiliate opportunity?). Diagonals will only correct the vertical (up-down) alignment of the image, but not the left-right alignment. There are special diagonals that can also correct the horizontal alignment if necessary.
Here are some advantages of refractor telescopes over the reflecting telescopes:
- Easiest to use among all telescope types
- Typically more compact and lightweight. So, easier to store and transport
- Less maintenance of all types of telescopes. You don’t need to recoat the lenses, while the reflector mirrors usually need recoating from time to time
- Collimation, the act of realigning the optics, is not required
- Long focal ratios can allow simpler eyepieces with a longer focus
However, there are also some drawbacks with refractors, namely:
- All refractors suffer from chromatic aberration, although high-end refracting telescopes have minimized this really well. However, cheaper refractors can suffer really bad from chromatic aberrations
- The eyepiece is positioned at the end of the telescope, and so you might need to bend when viewing and if the telescope is heavy, this can be a problem if you plan to use it for a long time.
- Much more expensive relative to reflecting telescopes
Here are some advantages of a reflecting telescope over the reflecting telescope:
- Relatively more affordable since a reflecting telescope is much easier to manufacture. This is especially true for bigger telescopes since bigger mirrors are easier to make than bigger lenses
- Won’t suffer from chromatic aberration
- Wider fields of view compared to refractors, so you can see vast deep space objects like galaxies
- Large mirrors can provide better light collecting capacity
As usual, there are also some disadvantages of a refractor telescope:
- Bigger and heavier than comparable refractors, and so harder to transport and store
- The eyepiece might be positioned in an awkward position depending on the design and might need some time getting used to
- Mirrors can degrade optical quality compared to lenses
- More maintenance is needed, especially collimation (adjustment to realign the mirrors to ensure proper imaging)
- A steep learning curve, more difficult to use for beginners
Below, we will discuss the different types of reflecting telescopes, along with our recommendations for each type.
1. Newtonian Reflecting TelescopesThe Newtonian reflecting telescopes are the most common, classic reflecting telescope design, typically featuring two mirrors, the primary mirror is placed near the eyepiece.
Our recommendation for this type is the Celestron Advanced VX 8″ Newtonian:
Key Features:
- 8-inch (200mm) aperture
- f/5 focal ratio for wide field views
- Parabolic primary mirror to minimize spherical aberration for a better image quality
- Integer gear ratios and programmable Periodic Error Correction to eliminate recurring track errors from the worm gear
- New motor design to improve tracking performance and more power to counter load imbalances
- Updated design for more durability, less flexure, and improved design aesthetics
Pros:
- Wide FOV, excellent for observing nebulae, galaxies, and celestial bodies. f/5 ratio is still pretty decent for observing planets and the Moon
- Various technologies to improve balancing
- Very sturdy and durable, built to last
- Excellent observation range with 8-inch aperture
Cons:
- Relatively heavy than some competitors models
- Difficult to operate, not recommended for beginners
The Celestron Advanced VX 8″ Newtonian is simply one of the best reflecting telescopes for astrophotography purpose. It is certainly not a cheap model, but it offers all kinds of features that are suitable for the larger budget.
An advanced amateur telescope with superb optics quality and excellent, balanced mount to provide an excellent performance. Also, a very intuitive interface although it may take some time getting used to.
Runner Up: Orion SkyView Pro 8 GoTo Reflector Telescope
Another 8-inch aperture reflecting telescope with 1,000 mm focal length (f/4.9 focal ratio). The SkyView features a 42,000 motorized object database, and is a great well-rounded choice for reflecting telescopes. Versatile choice for serious astronomers who wants to see a little bit of everything.
2. Cassegrain Reflecting TelescopesThe Cassegrain reflecting telescopes feature a parabolic primary mirror with a hole and a hyperbolic secondary mirror. The secondary mirror reflects light, and so it is focused onto the the hole in the primary mirror (see previous image above).
This ‘folded’ optical path in Cassegrain reflecting telescopes allows them to be smaller and typically lighter.
Our recommendation in this category is the Celestron CPC 1100 StarBright XLT:
Key Features:
- 11-inch aperture Schmidt-Cassegrain design with Celestron’s Premium StarBright XLT optical coatings
- Fully computerized dual-fork arm altazimuth mount with internal GPS. Database of 40,000+ celestial objects
- 9×50 finderscope to help accurately find deep space objects
- Ergonomic design, easy to transport the telescope from location to location
- Heavy-duty tripod included, so attaching the telescope is so easy so you can do it in the dark.
- Features sturdy 2-inches Steel legs and accessory tray
- Star diagonal and 1.25-inch eyepiece included
- Convenient hand control holder, allows us to use the telescope hands-free
Pros:
- High-aperture (11-inch) level and great-quality optics. Superb viewing and photographic performance
- Premium StarBright XLT coatings offering premium aesthetics
- Easy to use Auto-Guider and GPS alignment
- Includes heavy-duty tripod, easy to transport and great for prolonged use
- Ergonomics design, easy to store and move around
Cons:
- Finder scope is pretty decent, but not very useful
- The tube and fork are relatively heavy to lift
The Celestron CPC 1100 StarBright XLT weighs 65 lbs, so it’s quite heavy. However, it does feature an ergonomic design so it’s relatively easy to move it from a window to your backyard. Since it is a Cassegrain telescope, it is also relatively compact so you can easily store it in almost any room.
Impressive 11-inch (280 mm) aperture, combined with the 2,800mm focal length ensures amazing clarity and brightness, even on cloudy nights. It is also relatively easy to use for beginners, thanks to the computerized altazimuth and SkyAlign system which can help even first-time users to track distant deep space objects.
On the other hand, expert astronomers can also appreciate its performance and versatility. One of the best Cassegrain reflecting telescopes available.
Runner Up: Celestron NexStar Evolution 6 Telescope
A powerful and portable Cassegrain telescope weighing under 30 lbs. 6” aperture with 40mm and 13 mm eyepieces to ensure clear and bright details even on dim objects.
Different Types of Refracting TelescopesUnlike reflecting telescopes where there are various methods to arrange the mirrors, we can divide refracting telescopes into just two types: achromatic and apochromatic.
1. Achromatic Refracting TelescopesAchromatic refracting telescopes use lenses that are not corrected to prevent chromatic aberration. Instead, refracting telescopes of this type usually feature coated lenses to reduce chromatic aberration.
Our recommendation for this category is the Celestron Advanced VX 6″ f/8 Refractor:
Key Features:
- 6” (150mm) aperture objective lens, with f/8 ratiom great for high-contrast deep-space objects (i.e. planets)
- Compact and portable mount, yet pretty rigid and durable with minimal flexure and improved industrial design
- Maximum instrument capacity of 30 pounds
- Rich set of features: PEC, auto-guider port, image across the meridian, etc.
- Dual-saddle plate is compatible with narrow CG-5 dovetails and wider CGE dovetail.
- Latitude range, can perform between 7° and 77° latitude
- Includes a 9×50 finderscope, 20mm eyepiece, and 1.25” star diagonal
Pros:
- Very durable mount despite its smaller mount size
- f/8 ratio, surprisingly tolerable chromatic aberration
- Easy to assemble and disassemble, easy to transport
- Pretty durable, and priced right for this set of features
- Baader Fringe Killer and Moon & SkyGlow filters remove blue fringing
Cons:
- Pretty heavy with 75-pound weight
- The finder scope is weirdly positioned and might interfere with your eyepiece
The Celestron 6-inch, f/8 achromatic refractor is pretty heavy at about 75 pounds, but it can be taken apart into pieces into no more than 18 lbs for each piece, for easier transportation. As an achromatic refracting telescope, it also has a tolerable amount of chromatic aberration.
The 6” aperture is pretty decent to observe deep space objects with high clarity, and is especially great at observing high-contrast images with jet black backgrounds. All in all, it is a pretty good pick for visual astronomy use.
Runner Up: BRESSER Messier R-102 102/1000 OTA Achromatic Refractor
Pretty expensive, but an amazing set of features, and the f/9.8 focal ratio makes the BRESSER Messier a great telescope for astrophotography. 102mm aperture and 1,000 mm focal length.
2. Apochromatic Refracting TelescopesApochromatic refractors typically use more than 2 lenses or lenses made of different materials to correct chromatic aberration. Apochromatic refracting telescopes are much more expensive than achromatic ones.
Our recommendation for an apochromatic refracting telescope is the Orion 09565 EON Refractor Telescope:
Key Features:
- 130mm (5.1-inch) aperture with triplet ED apochromatic, and pretty affordable as an apochromatic telescope
- Three-lens ED design, and pretty fast f/7 ratio. Well-rounded performance for both visual and astrophotography
- Huge 3-inch dual-speed (11:1) Crayford focuser. Allowing a more precise focus control for clear visual observations and sharp images
- Great aesthetic design, beautifully constructed
- Two-split clamp tube rings included, with a triple-latch hard case for protection during storage and transport
Pros:
- Huge aperture for its price
- Elegant design, one of the best looking telescopes
- Well-rounded f/7 ratio, great for both visual and astrophotography
- Excellent set of features
Cons:
- Relatively heavy
- Mount not included in the package
- Slight field distortion
A well-rounded choice for serious astronomers or astrophotographers. 5.1” (130mm) aperture and 910mm focal length with f/7 focal ratio. This is certainly not the cheapest refracting telescope, but for its price, it offers an amazing set of features and overall performance, especially considering it’s also an apochromatic telescope.
Truly resistant to chromatic and spherical aberration, the Orion 09565 EON Refractor Telescope is especially good for astrophotography. Weighing 22.5 pounds, it is pretty light, and also comes with a hard carrying case. However, keep in mind that it doesn’t include any mount in the package.
Overall, a well-rounded apochromatic telescope at a competitive price.
Runner Up: Meade Series 6000 130mm f/7 ED Triplet APO Refractor Telescope
The series 6000 offers a 130mm f/7 aperture with ED triplet apochromatic design. It is certainly expensive, but this is also one of the most powerful refracting telescopes out there, and is pretty well-rounded for both visual and astrophotography.
Reflecting vs Refracting Telescopes – Which is Better?The answer to this question would ultimately depend on your needs. Both reflecting telescopes and refracting telescopes now come in both low-cost budget models and premium, very expensive models for those with more leniency in budget.
The first thing to consider here is the aperture. It’s much easier (and thus, cheaper) to create reflecting telescopes with bigger apertures since manufacturing larger mirrors are easier than larger lenses. The more aperture you have, the more dimmer things you can see with a clearer quality.
So if you want a bigger aperture with a limited budget, then you’d probably want to opt for one of the reflecting telescopes listed above.
On the other hand, if you are looking for a 4” aperture or less and don’t want to learn collimation, it’s probably better to get a refracting telescope. Refracting telescopes are easier to use and also typically more durable, so are great for beginners.
Also, they are more versatile, you can get star diagonals to ‘correct’ the images and you can then use them as a terrestrial, daytime land scope. However, remember that chromatic aberration is an issue with the refracting telescopes, and apochromatic ones (that correct chromatic aberration) are expensive.
We hope you found this article informative and useful.